


Log Splitter Construction
There are some excellent sites out there showing some unique and innovative log splitter designs by some very creative inventors. So, I decided to try my hand at one. Of course all log splitters (even all machines) share some basic fundamental principals that have all been used before. It's the differences that make things interesting.
"Everything has been thought of before, the difficulty is to think of it again." Goethe
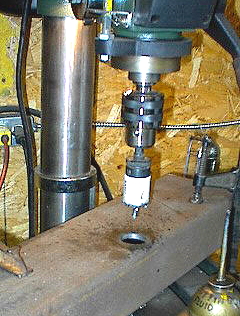
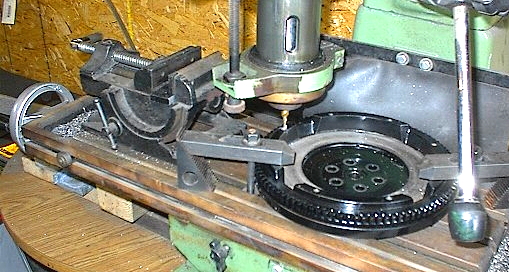
I used an eight inch 'I' Beam for this logsplitter. Notice the large and small holes predrilled for possible wires and hoses. It's far easier to drill the holes on a drill press than later, with a hand held drill, especially when using a hole saw.
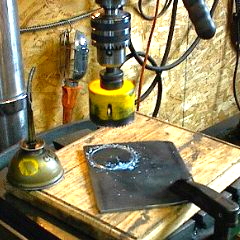
The bigger the hole, the slower the speed should be. For any hole over one inch, use the slowest speed and even that will be too fast for the larger hole saws with most hobby shop drill presses. The little ones (good for pilot holes or wood etc.) usually only go down to 600 rpm and the bigger floor models, with three top pulleys still only get down to about 200 rpm.
"When you don't know what you could know, you think that what you do know, is all that you need to know."
D.J. Huggett
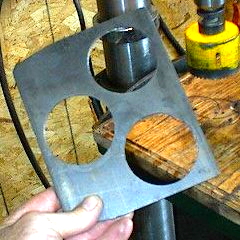
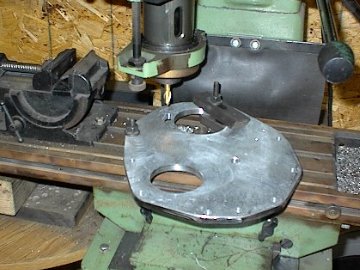
The "Coffee Cup Holder" plate cut out of 1/8" steel.
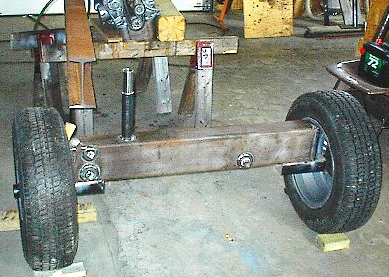
Right - The tank axle completed and ready to have the 'I' beam welded on. Notice the "pipe thread" flanges are welded on. The vertical hydraulic oil fill tube is 1.5" black pipe. I machined the top out to take a 1.5" stainless pipe that was pressed in. That lets the breather filter fit better, and looks good too.
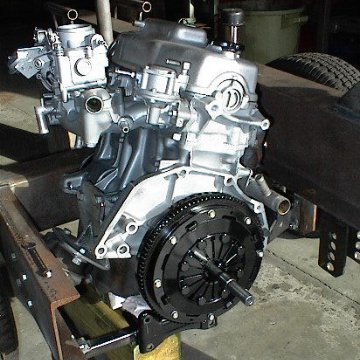

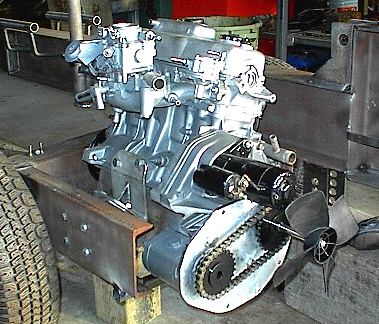
After blocking all holes, I sandblasted the engine and gave it a quick coat of some left over "silver grey" car paint. Notice the driveshaft coming out of the center of the clutch assembly. That was the mainshaft that went into the gearbox or transmission. I cut it in half, mounted it on the lathe, ground off the two remaining gears then machined it to a 3/4" shaft. The keyway was then cut out on the milling machine. It's at the bottom in this photo, so it doesn't show.
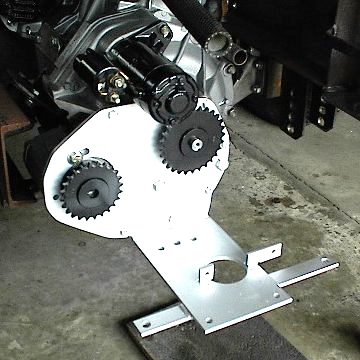
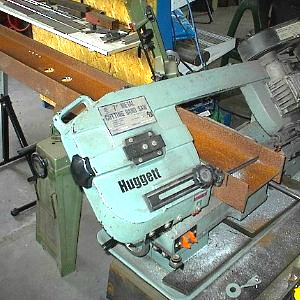
Part of the bell housing was "cut out" on the bandsaw to allow room for the pump. The mounting plate is installed with the starter motor and sprockets. This method is more versatile than the more common direct shaft mount. I can adjust the relative motor and pump speeds by changing the sprocket sizes, which, of course, cannot be done with other log splitters.
Now the problem is how to mount the radiator. I took off the mounting plate, milled out an elongated hole so that the pump is now moveable for the chain tension adjustment. The bottom plate will accept the radiator.
Notice the single splitting wedge at the back, partially stuck in the upside down mount. That was just to hold it for painting its base. The splitting part was painted silver and is taped up with newspaper. The holes in the brackets for the adjustable height tow bar (and stand) can be seen.
All put back together and ready to go.
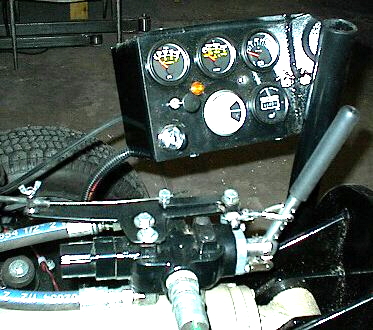
Bending the muffler pipe was tricky and so was designing and cutting out the mounting bracket. The bends had to be exact as the clearances are tight. You can just make out the 6 way splitter wedge at the top left of the photo. The wedges can be changed in seconds to split a log in 2, 4, or 6 pieces with one stroke of the ram.
Here's another way to build a logsplitter if you have a tractor with a three point hitch and rear hydraulics. (Wet Kit) It can be used in this position or vertically and lowered to the ground.
Because the tractor supplies the frame, engine and hydraulics, I was able to build this for $200.
(using a salvaged I beam)
It worked well but with less power and slower than the one below, especially since it could only split a log in half.
"A fool thinks he knows all about something because he knows what it looks like." D. J. Huggett
This pile took me less than 10 minutes to split. The machine is faster and quieter than the store bought 5-8 HP ones but uses no more gas to split the same amount of wood. That's because it is idling when not splitting or returning and even then it rarely exceeds 2000 rpm except for the odd few seconds now and then for a stubborn gnarled burl. The tow bar is not in the stand position as I just left it attached to the tractor.
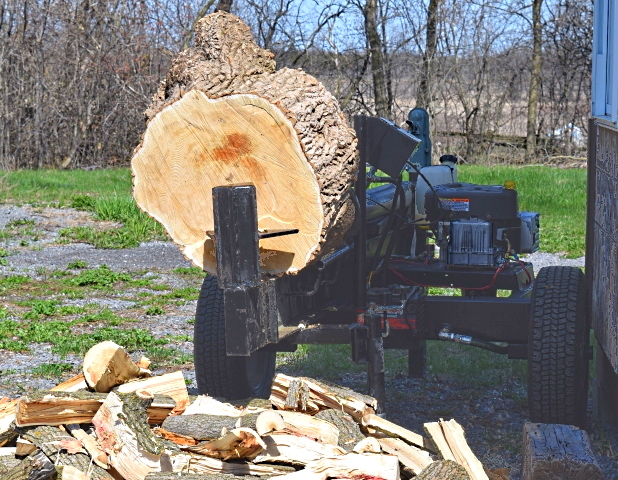
Below - After many years, the 40+ year old Honda Civic engine and carburetor needed complete rebuilds, so I just replaced it with a 17hp Briggs & Stratton engine from an old ride on mower. It's not as quiet or as powerful as the Honda was, but it works OK. Because of the single stage pump, 20hp or more, would be better, but it split the log below without too much effort, even using the "four way" splitter, which requires more force than a standard "two way" wedge.

"I like to get as much "Stainless" into my creations as possible"

"If things are not failing, you are not innovating enough." Elon Musk

Modifying an Electric Log Splitter For One Hand Operation
(and return the Pusher to remain at any location)
After many years of using and appreciating the advantages of splitting large pieces and quantities of wood with gas log splitters, I was aware of their disadvantages. Some being problems with all gasoline engines, - starting, noise, noxious fumes, oil changes, maintenance, and the hazards (and aging) of gasoline itself. The others are - inconvenience, storage and initial cost, especially if you only occasionally split small pieces or even wish to use it indoors beside a woodstove for a quick split of some larger chunks for a better fit, top-up, etc..
But, the main complaint with these types of electric splitters is that they require two hands to operate, one to press the On Button, and the other to press down the Hydraulic Control Lever.
"You shouldn't do things differently just because they're different. They need to be - better."
Elon Musk
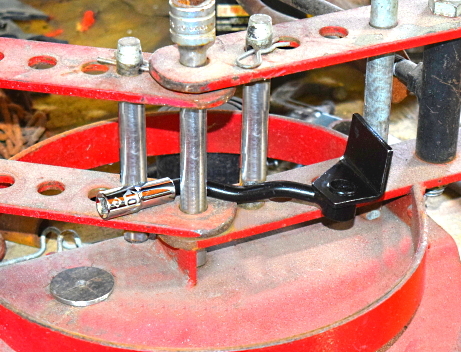
The easiest way to bend the handle is with a simple bender. The 10mm "deep socket" placed over the threads, prevents them from marring.
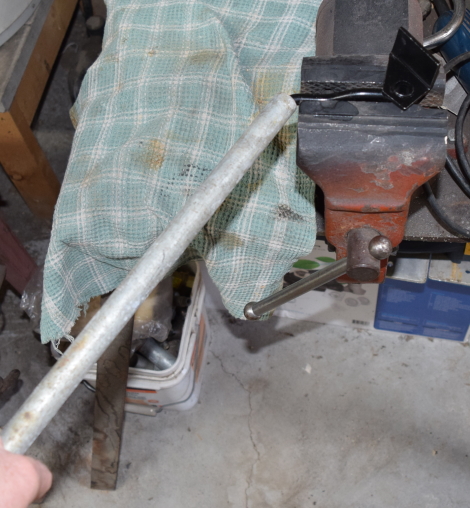
If you don't have a bender, the handle can also be bent by placing it properly (like below) in a vise and using a 1/2" pipe. It only needs to be bent a few degrees so that the handle, when installed, is parallel with the machine, instead of sticking up slightly.
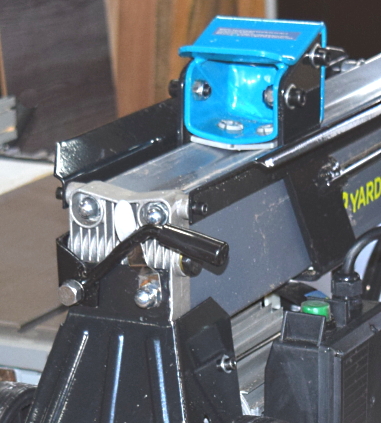
By only removing the guard, most people will be able to operate this machine with just their right hand, but by bending the handle down slightly, it becomes even easier. (thumb and middle finger shown)
Also, the removed guard better exposes the heat sink fins, allowing for better cooling, especially during long, hot, difficult and forceful splitting sessions.
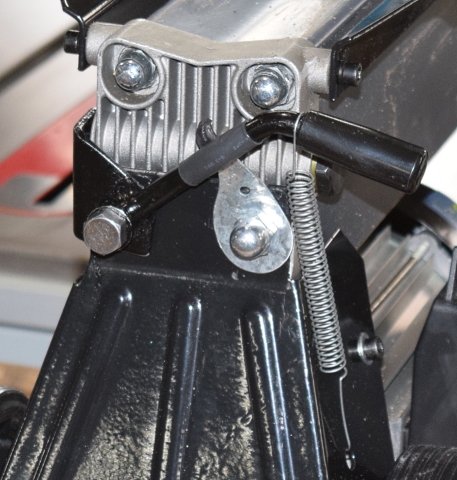
The lever should be able to be pushed down and stay there until pushed up. This allows the Pusher to stay at your desired position. An easy way is to cut out and bend a piece of sheet metal and cover the end with heat shrinkable tubing with another piece on the lever. The optional spring just removes the return tension.

Although requiring more skill, this method works the best and needs no additional coil spring. The cutting board plastic is a natural lubricant, but a tiny dab of thick grease helps it work even better.
You won't need to protect the threads as much with this method as the pipe only touches the top and bottom of the arm being bent. You could put a nut over the top threads to prevent slight squishing.
First use - tough Honey Locust logs (cut with my Greenworks electric chainsaw) delivered with the tractor bucket (left). My old adjustable scaffold with longer 2X4 legs at right to hold the wood, makes a great temporary setup.
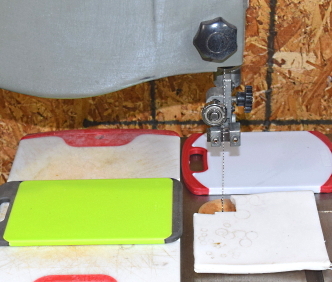
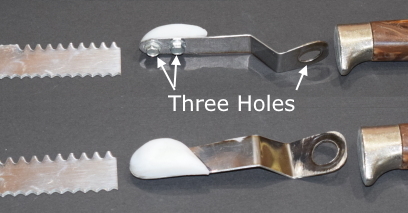
This worked okay, but with the rubbing on the shrink tubing, I could tell that it was not the best solution and would wear out with much use. Also, the mild steel barely had enough "spring" pressure. A much better way would be to use stainless spring steel found in any cheap thin blade knife (~.8mm). Cut a piece out with an angle grinder, using a thin "cut off" wheel then drill out the three holes, and bend it to fit. Then cut out a piece from an old cutting board and screw it to the bent steel using short, coarse thread, sheet metal screws.
Trim and sand it round, as shown in the two knife picture views below.
Cutting Board assortment - use the thickest available.
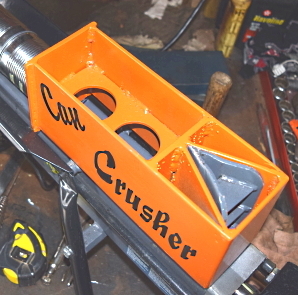
Building a Can Crusher Attachment
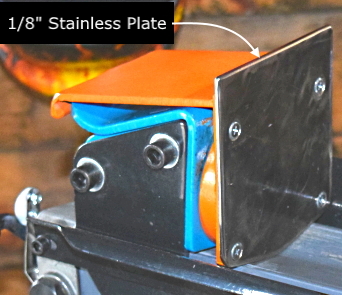
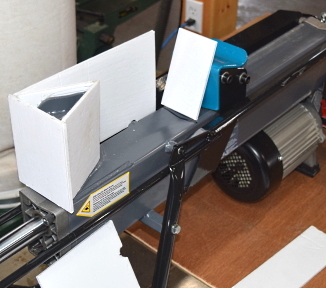
One way to help build a more complex welded fabrication of smaller pieces (a weldment) is to first cut it out with cardboard - for thin metal, or from foamboard for thicker metal. The foamboard can be purchased from most Dollar Stores. It cuts with a box or utility knife, also from the Dollar Store and bonds with a hot melt glue gun. If you're good with weldments you probably won't need this method, but it may still help, even if just for the wedge pieces because of their multiple angles. I used 1/8" flat plate, but the front ends, and center section were 3/16" - see the "just painted" pic below.

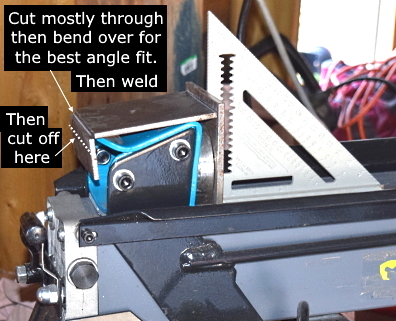

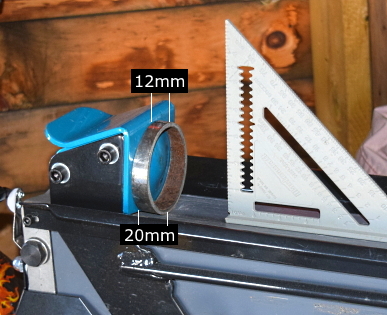
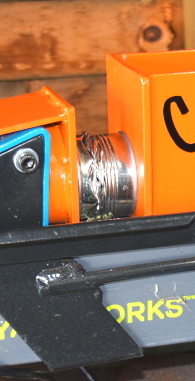
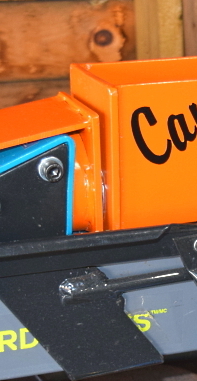
The Pusher has a convex centre section which can be used "as is" for crushing cans (which saves a lot of work) but it loses some efficiency as it stops when the centre touches just before the can is fully crushed and may be less effective for larger cans or other crushing, or even metal bending and forming uses. I used an old 3" pipe (3½" OD) and cut it at an 85° angle to negate the Pusher's angle and make the final angle 90° - as shown.
<— This pic shows a simple trick I use when I need a quick angle cut, without the hassle of changing the back plate angle. Notice the 1/2" drill bit sticking up on the left side of the back plate. By changing its location or using different bit (or rod) sizes, various angles can be cut. Of course, to know exactly what the angle is, you'll need a protractor. (or equivalent smartphone app)


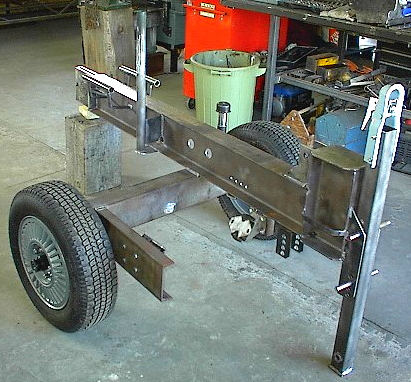
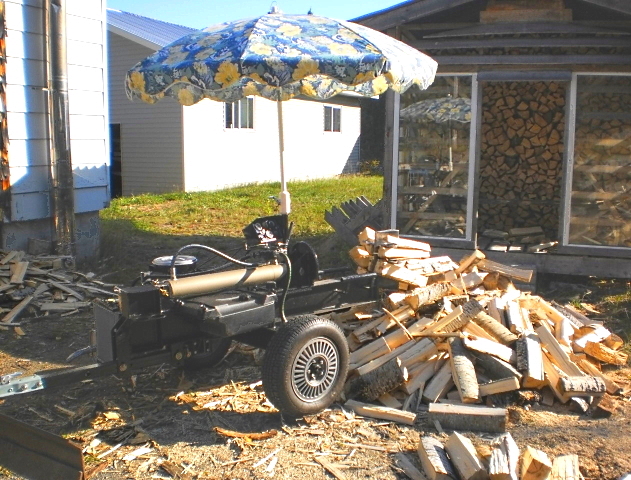
'I' Beam welded to the tank axle. Since the motor takes up the most room the 'I' Beam is offset but welded on an angle so that the splitter will track centered behind the tow vehicle. The adjustable height tow bar is in the vertical position and now functions as a leg. The umbrella mount is noticeable as is the 5" 'C' channel which holds an engine mount, the opposite one is more visible. The far end is the receiver for interchangeable blades. In one stroke this splitter will be able to split logs in two, four or six pieces, depending on the blade installed.
<— Sandblasted (on my adjustable scaffold) followed by a coat of primer and paint —>
It worked extremely well crushing a steel soup can, (tin plated) which is much stronger than aluminum beer and soft drink cans.
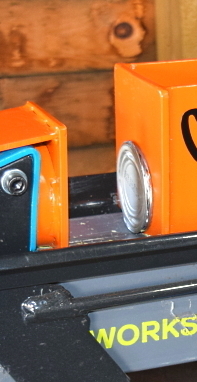
There is room to crush three cans at once as shown in the video below.
Three pieces of flat plate are clamped to the Wedge, then tacked, removed and welded.
Above Right - Once everything is welded together, it's tested, then fitment adjusted and smoothed out with final grinding.
At first I thought that this was going to be a simple project that anyone could do - just attach a flat plate on the Pusher and one on the Wedge - et voilà, done. But, many "simple" things can end up being more complex, and this was one of them. One feature of these types of log splitters is that the Pusher and the Wedge are both angled forward at ~85° to help "stick" the log and start the split with a smaller surface area (more PSI). This also helps keep some logs from lifting up during initial contact. But, this added a level of difficulty as did wanting it to be "self contained" (therefore longer) without needing to add spacers, like blocks of wood, etc..
These all in one, (Motor, Cylinder, Pump, Tank) assemblies, although quite robust with an ample cooling fan, will heat up less and last longer if not run continuously. (i.e. by holding the button down with clamps, cords, bungies, etc., or by changing the button to an On/Off "Toggle Switch", etc.)
Click on the Movie Clip below to see the Crusher and Splitter in action. Use the bottom Control Bar to Adjust the Volume, Full Screen, Playback Speed, etc. to your preference.

Shortcuts While Playing
The Spacebar or Enter or Left Click will stop/start the video.
Double Left Click will enter Full Screen - Esc to return.
Home and End will return the video to its Beginning or End.
Mouse outside/inside of video to remove/return control bar.