


"I can still do what I did in my youth, it just takes longer and hurts more." D. J. Huggett
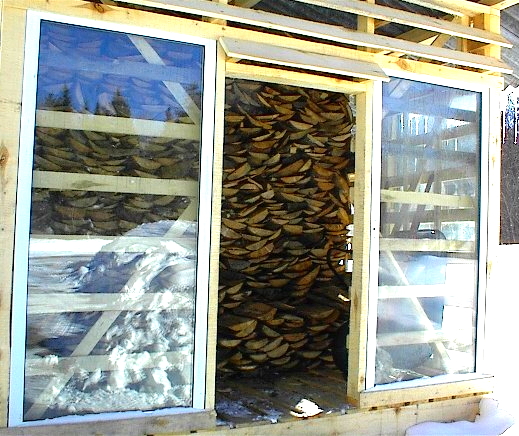
Most wooden things can be either too wet or too dry and the best humidity is somewhere in between. Firewood is one exception, it can never be too dry. The drier it is, the easier it lights and the better it burns. That's because more energy is converted into heat for your home and not spent converting moisture into steam and sending it up the chimney, which also aids in creosote deposits.
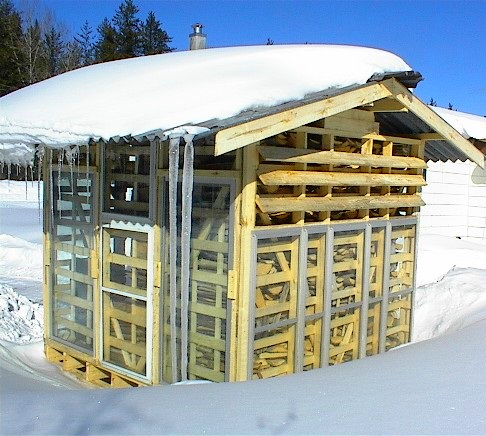
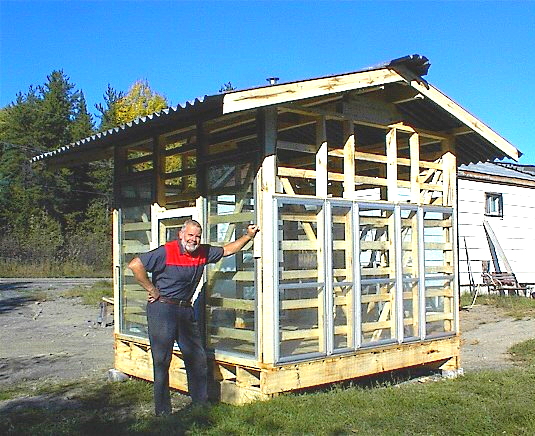
The two basic requirements for drying wood are warmth and ventilation and they should work together. You want a structure that allows the heat of the sun in and keeps out the rain, yet allows the moisture from the wood to escape.
The best way to do this is to use as much glass as possible to take the best advantage of the sun but to also use a raised ventilated floor, open gables and soffits to allow the moisture to escape.
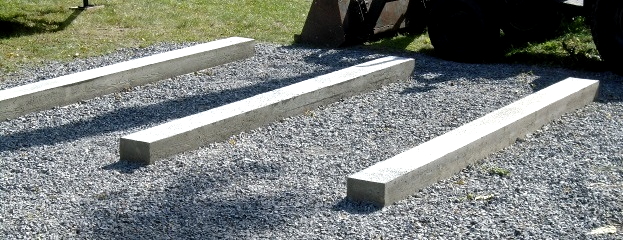
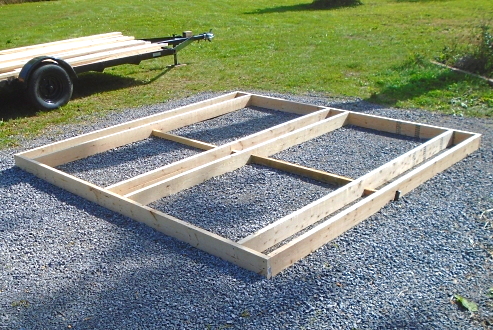
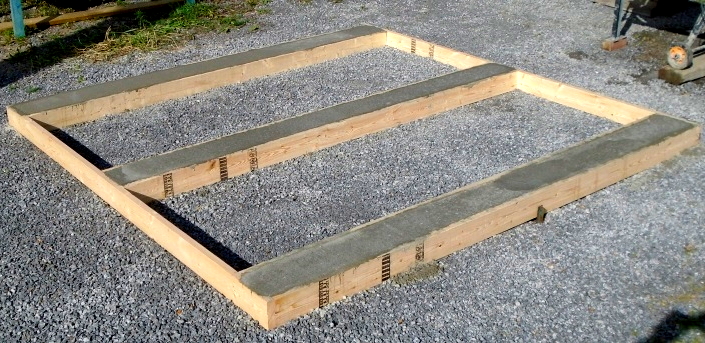
A good foundation is always important and a woodshed can hold several tons of wood. That's why I have used three full length (10 feet) solid concrete footings. If you're building a garden shed, you could omit the centre footing or use 2X4 floor joists instead. I used eight spruce 2X6s for the concrete forms. After pouring the concrete, they were pressure washed, dried, then stained/sealed and used as floor joists. Only two stakes were required because of the internal bracing.
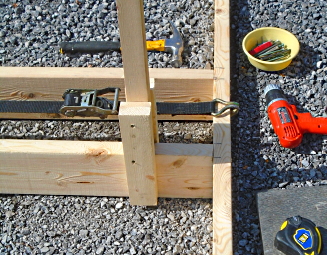
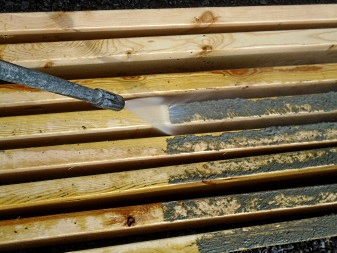
Here's how I solve the problem of warped wood.
The ratchet strap pulls the warped board in while the straightener, that I screwed together with three scrap pieces, unwarps the 2X6 while it is screwed in place.
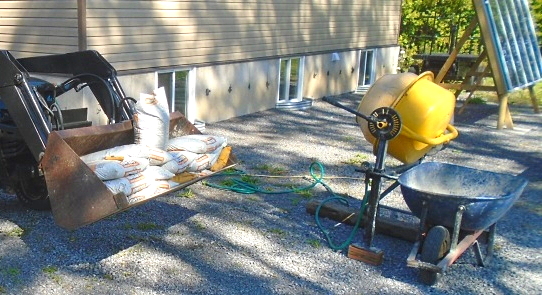
With 2X6s at 8" apart, two bags of Concrete Mix will do three feet, so each footing takes seven bags.
Remove forms as soon as concrete sets and pressure wash immediately to make the job much easier.
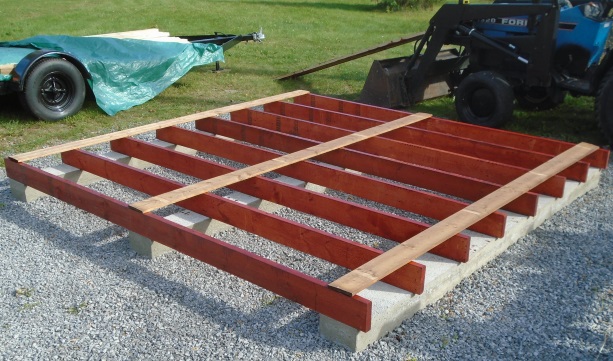
Below, the floor is upside down with three pressure treated fence boards screwed on as mounting pads and to prevent bottom twisting. Of course you could use 2X6 or 2X8 boards and more tapcons if you need a stronger fastened, more "wind resistant" structure, especially when empty.
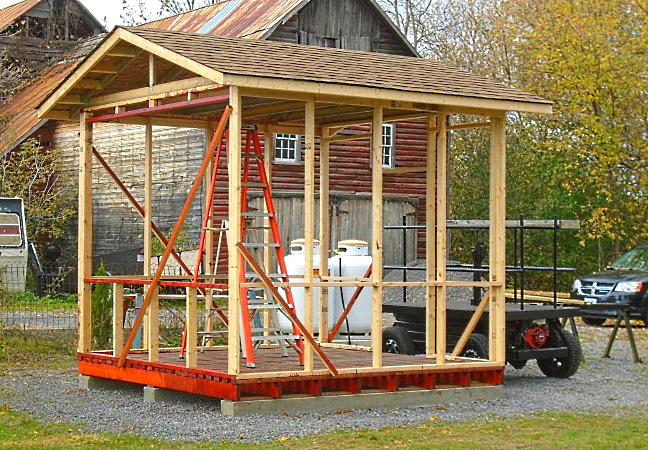
The frame is finished and ready to stain. The roof is sheathed with 7/16" OSB and shingled to match the house. Because the shingles are double overlapped at the top, and it's a vented outside building, no ridge caps are needed.
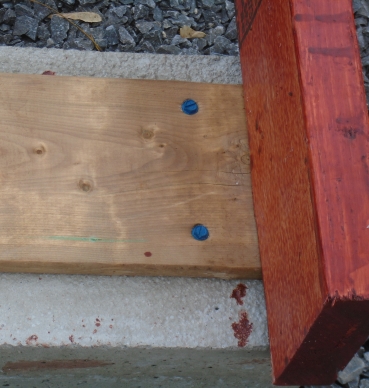
The floor is turned right side up and the mounting pads are double "Tapconed" into the concrete at the corners, and with some single Tapcons in the middle sections.
Patented in 1976, Tapcon means the ability to TAP its threads into CONcrete.
(after the right size hole is drilled first, of course)
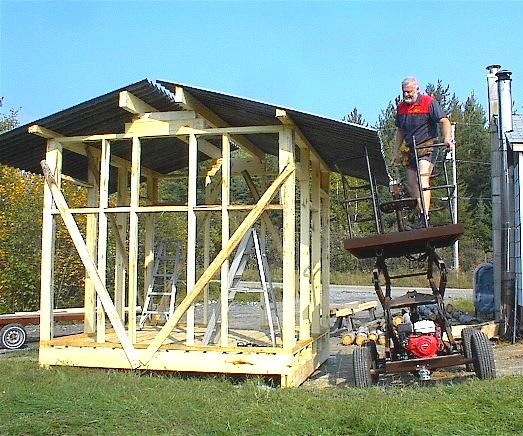
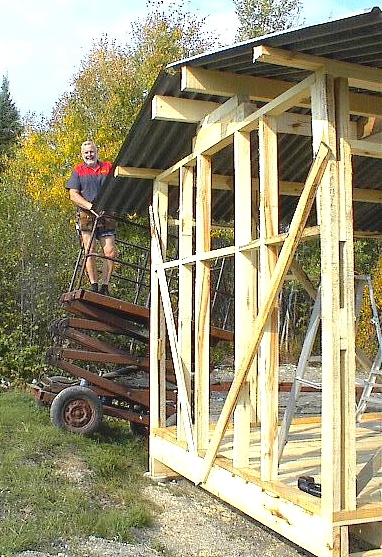
For all of the structures I have built since 2000, my homebuilt scissor lift, shown here and throughout this website, has been indispensable.
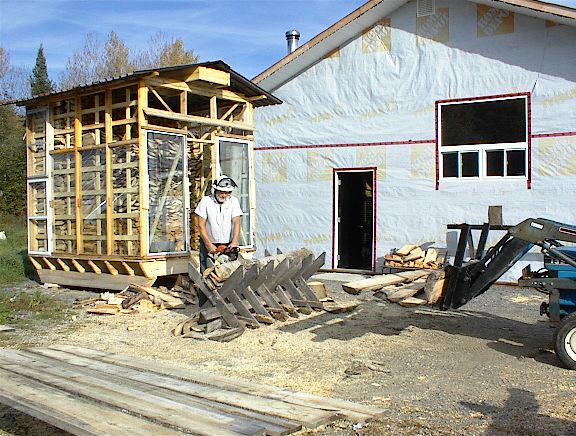
Below - Almost finished, taken from the house roof. The windows are all second hand (free) and the siding is Kaycan vinyl, the same as the house.
Here are two other wood sheds that I built at a previous address.
You can see the versatility of my Scissor Lift in the construction. I've even used it at steeper angles but, of course, only at low heights.
There is no
Build A Scissor Lift
page as my 35mm film camera broke just before I started to build this scissor lift (May 2000) and I didn't get my first digital camera until I finished it. (July 2000). Therefore no construction photos exist.
I may take some close-up pictures of its various components and do a page in the future, explaining the physics of its construction including the attachment of the cylinder. I finally gave it a paint job, on the Free Television page.
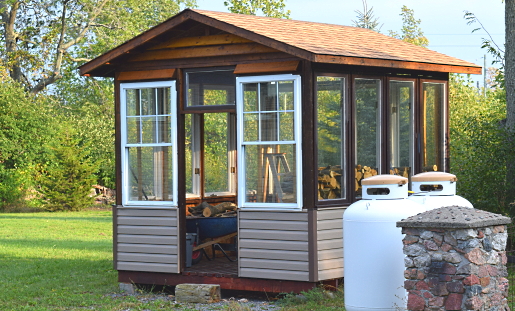
The re-claimed roof tin was a commercial grade with a deep corrugation and thick steel, therefore rafters were unnecessary.
There is also lots of ventilation under the floor and a one inch space between the floor boards.
I was amazed at how quickly the wood dried compared to regular wood sheds that don't have the glass walls or a raised floor.
These sheds were built for about ten dollars each. The glass was old storm windows and patio doors that were discarded. The roof tin was from an old barn that was being demolished and the wood was from old poplar trees that I cut down and ran through Mr. Sawmill. The cost was for the gas for the chainsaw and sawmill and for the nails and screws.
At the back shed I'm cutting up the leftover outside slab wood from the logs that made the lumber using a sawbuck that I also built from leftover scraps. The cut slabs were dried in the woodshed for firewood. The tractor is holding the "ready to be cut" slab wood, with my custom built forks.
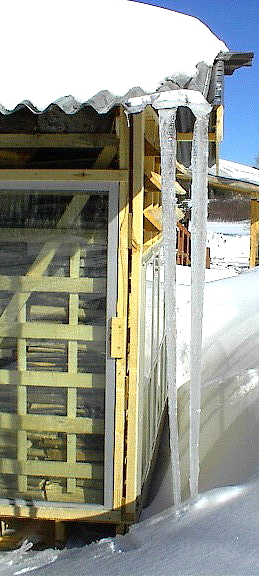
No matter what the weather, the wood always stayed dry.
"To be absolutely certain about something, one must know everything or nothing about it." Olin Miller
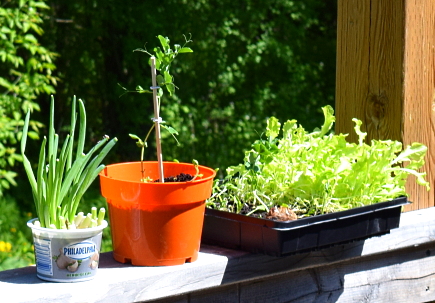
The left are root cuttings from green onions bought at the grocery store. They will grow to twice this size and the short ones have just been planted.
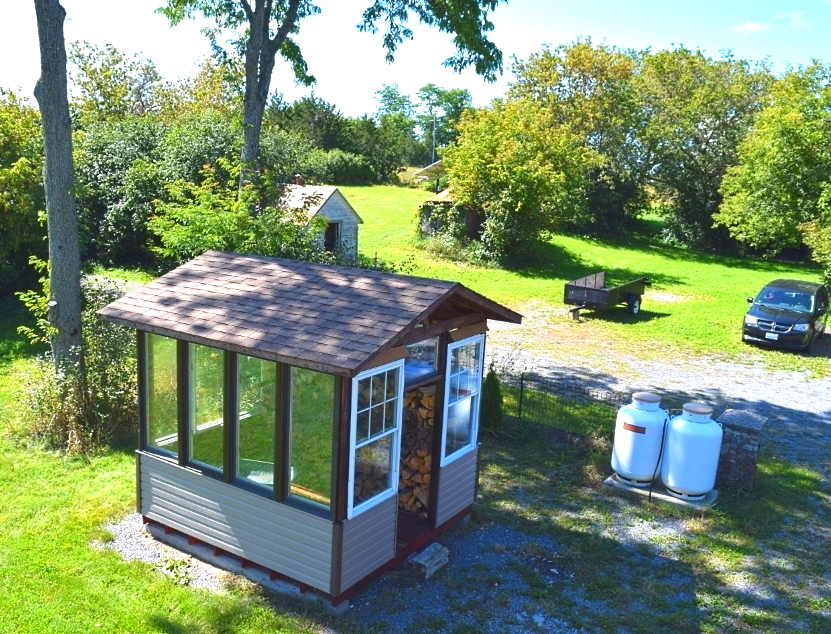
Another advantage of a windowed woodshed is that it can also be used as a faux greenhouse in the summer, if it's not full of wood, of course. Just add a few shelves and hooks. It will not work as well as a real greenhouse though, because of its extra ventilation and solid roof.
see
Your Own Greenhouse page.
"I cannot do all the good that the world needs,
but the world needs all the good that I can do."
Jana Stanfield