


Hot Water Solar Heating
An experiment to see how much free heat from the sun, can be added to your house.
"We go about our daily lives understanding almost nothing of the world." Carl Sagan
(from his intro to Stephen Hawking's "A Brief History of Time")
There are many ways to heat your house with the sun, from passive or active air and closed or open loop water systems. There has been much research done on this subject and there are many great websites explaining in detail the pros and cons of each system and where to purchase or how to build your own. Some of the home built systems cost thousands of dollars just for the materials although many have been built for much less. As with everything in my home, I have always tried to get the most bang for the least buck.
It is easy to spend a thousand dollars to save a hundred, but it's better (and harder) to spend a hundred dollars to save a thousand.
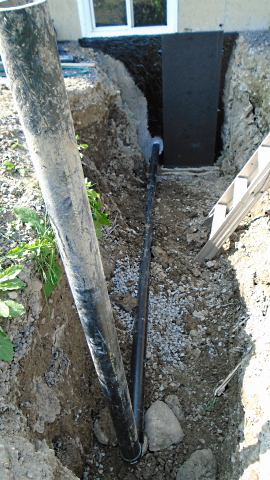
In a climate that is subject to freezing, the simplest, cheapest and most practical way to use solar heat is the water "drainback" system which requires no antifreeze or special automatic control and regulating valves. You also don't need to dig a deep trench like I have done as I had to repair a crack in the foundation. Since the water drains back into a basement tank, the pipe can be just below grade (for protection, avoid tripping, etc..) - unless, of course, your array is against or mounted to the house - then the pipe can go into your house above ground.
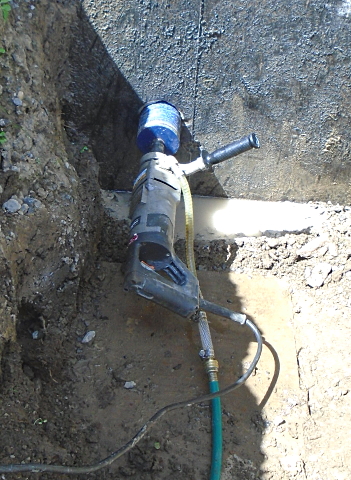
This trench took less than an hour to excavate with my backhoe attachment (~6 tons of dirt) but another hour to drill the 4" hole in the foundation and install the 3" ABS pipe.
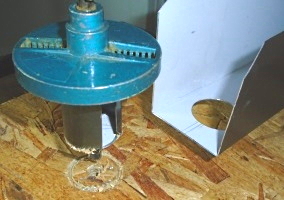
Drilling (or boring) the 4" hole with a diamond core bit. Notice the garden hose which supplied water through the drill "chuck" into the core bit. It kept the bit cool and prevented a dust cloud.
The 3" ABS pipe has been installed and sealed with the grey polyurethane caulk around the pipe.
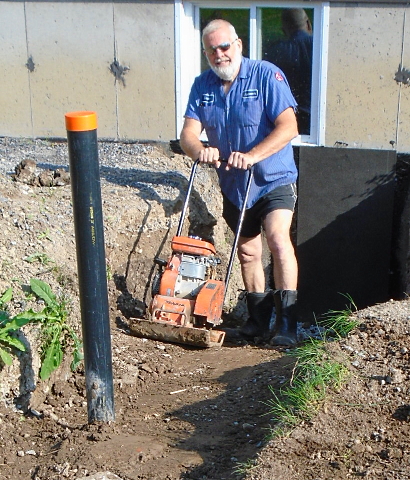
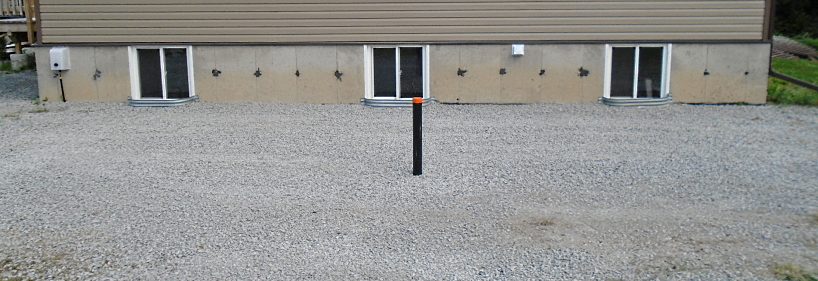
Every other bucketful of dirt was compacted to minimise settling. Several weeks later after two torrential rainfalls it settled about an inch, then more dirt was added for the final grade.
The dark spots on the foundation, at every two foot seam, are covering the craters made when the steel form ties were broken off. Instead of buying the concrete patching compound, normally used for this purpose and would have matched the colour better, I used the tile floor grout from my kitchen which worked even better than the patching compound. A concrete sanding disk would blend the colour better or it could be parged with a grey or brown concrete coating when all is finished.
Testing and Designing
Expanding upon Carl Sagan's quote at the top, many people live by "the seat of their pants" with little knowledge of science. They judge everything superficially, with anecdotal information from friends and the media. Some of my (and other's) quotes on this website address that mindset.
Although this site was created to give a brief display of ideas and to stimulate others, it has all been based on my love of science and physics without getting too abstruse with math, equations and complicated explanations.
In his famous book for the general public, A Brief History Of Time, Stephen Hawking wrote,
"Someone told me that each equation I included in the book would halve the sales. I therefore resolved not to have any equations at all."
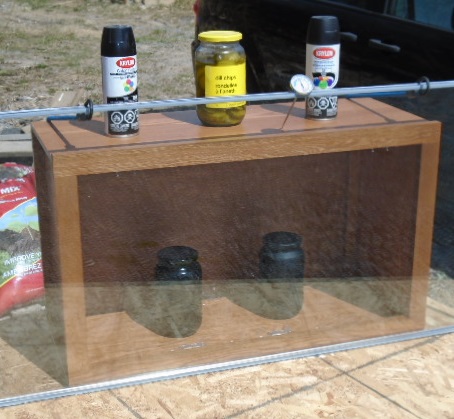
Often the best way to answer a science question is just to do a simple experiment, the empirical approach. There are different opinions about the best colour for a solar collector with Black being the unanimous choice but is there a difference between Gloss and Flat? Which one absorbs the most heat per equal area and by how much? Common sense would assume that a Glossy surface would reflect some sunlight and a Flat surface would reflect less and therefore absorb more. So, I did a simple test at the right using an old cupboard box, a glass thermal pane and two identical pickle jars - one painted Flat and the other Gloss Black. Both were filled from a pail with the same amount of room temperature water. After five hours in uninterrupted sunlight, the water in the Gloss Black jar was almost 66°C and in the Flat Black jar it was just over 66°C. So, the difference was just the thickness of the line on the thermometer and therefore negligible.
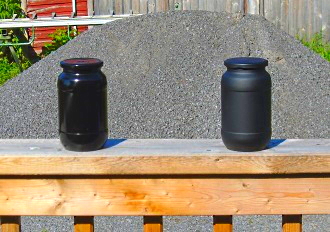
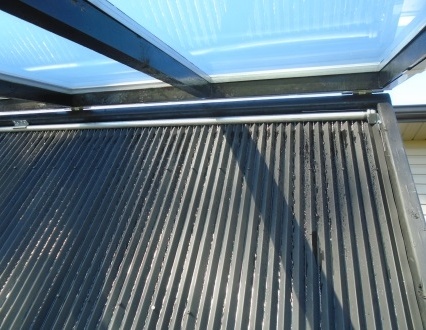
In trying to measure the 'radiation' heat from the sun on a surface, we haven't considered the 'conductive' heat from our 'solar oven' through the jar's glass, where colour has no effect. So I did another experiment with the two glass jars out in the open. After three hours the water temperature had risen from 18°C to 34°C in both jars and after six hours the water was 40°C in both jars where it remained until the sun's angle decreased and the jars began to cool as they gave off their heat to the surrounding air. This was surprising as one would think that if you removed the 'oven' effect, the difference in Flat and Gloss would be more pronounced (ignoring Kirchoff). We also learned one other thing from this experiment, which we already suspected. A solar collector must be behind a sheet of glass to absorb and retain the maximum amount of heat from the sun. In an open waterfall system like mine, the glass will also keep contaminants off the array's surface, from entering the water and will keep rain from adding to the system and eventually overfilling the basement tank.
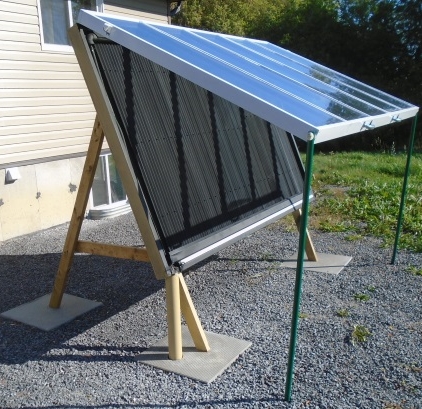
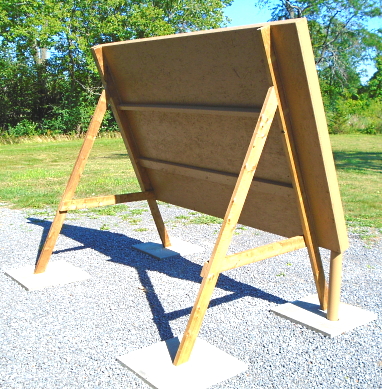
This test unit will demonstrate how efficiently the water picks up the heat from the ribbed surface as it falls, without all of the extra piping - which is often attached to a ribbed surface anyway, but is a tried and proven method that works.
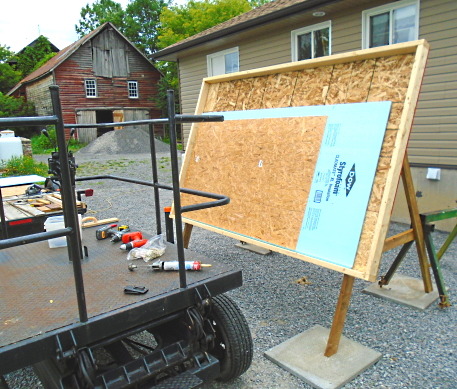
Building the Frame
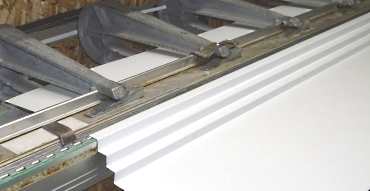
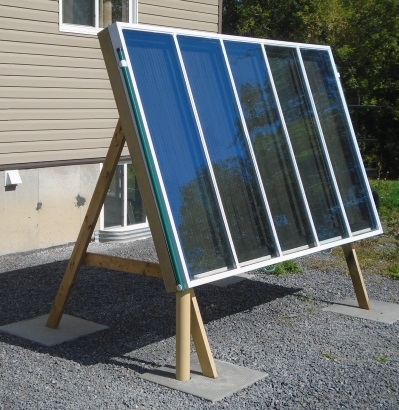
It's just a standard 2X4 structure with a 1/2" OSB backboard, with 1 inch styrofoam then covered with 1/4" OSB to prevent the ribbed panels from melting the styrofoam and for something to screw them to. You could also cover it with 1/2" OSB. It is sized to accommodate the five 20" X 64" sealed glass units that I got second hand, free from a builder. The exposed 3" ABS pipe is painted, not only to appear congruous, but to avoid UV deterioration. Note that the scissor lift also makes a great mobile, height adjustable work bench/table.
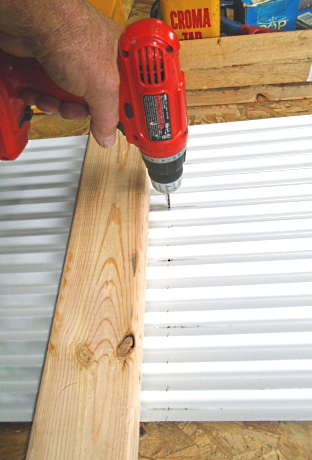
Building the Ribbed Panels
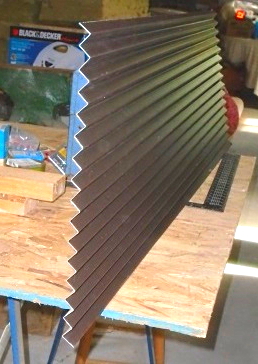
Using 24" Aluminum Flat Stock, cut the panels to length, then mark and start in the centre. Bend at 90°, flip the panel over, push in until it stops at the bending arm (3/4") then bend at 90° again. Continue working out from the centre, then do the other side. Since most brakes can bend more than 90°, it can be difficult to know when you're at 90°. I use a bent over 1X1/8" metal stop (foreground) to get a perfect 90° bend. Of course the angles to the flat surface will be 45°. The 24" wide panel will be 17" when finished and can be done in about 15 minutes or less.
Keep in mind the problem with PEX fittings is that they attach inside the pipe, reducing its diameter and therefore, flow. With a gravity return, you'll need the largest opening possible.
It will be a challenge to attach the PEX tubing to the trough, as there are many ways to do it.
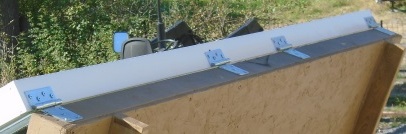
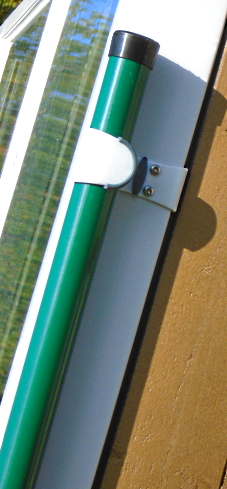
A 10' top fence rail was cut in half for the two 5' stand posts and capped with 1 1/4" chair leg grommets from Canadian Tire. The holding clip is an over the door hanger from Dollarama.
The 10' rails also make great guy poles for an antenna tower. See the Free Television page.
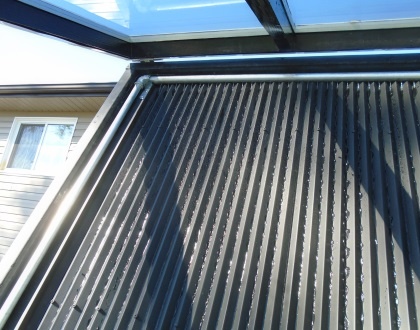

3/4" galvanized pipe worked perfectly for the water supply. The flow was even and constant from every hole, although not so easily seen in these photos.
Galvanized Gate Hinges worked well on the top.
I drilled 92, 1/16" holes in the 3/4" top pipe. The flow will have turbulence if the inside of the pipe is not deburred. I did this by running a 1/2" copper pipe back and forth from both ends, inside the 3/4" pipe.
The size of your holes will depend on the power of your pump and the length of your top pipe. If the holes are too large, there won't be enough pressure to get to the end. If the holes are too small you may not get enough water flow.
If there is a slight angle of the running water afterwards, then ream a 1/16" drill bit through the hole with the water running.
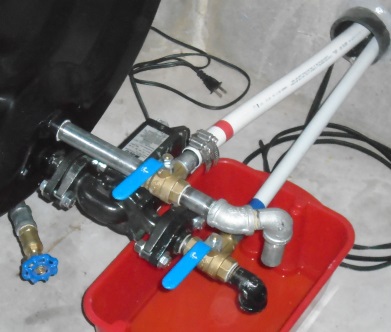
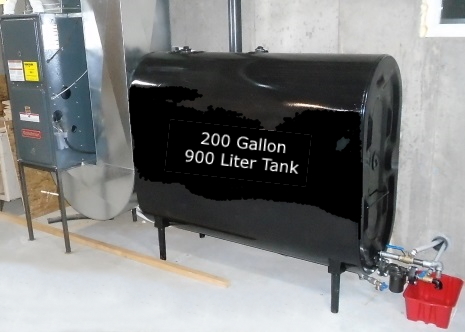
Tech Notes: When a circulating pump is turned off, the water in the pipes will drain back to the same height as the top of the water level in the reservoir. The advantage of a stand up reservoir tank is its small footprint but the disadvantage is the height of the water, which in most basements will be as high or higher than the ground level and therefore much above the frost line in a cold location. During the fall and spring this won't be a problem but to lower the water level in the pipes I can turn the 3 way ball valves to drain the pipe water into the red container. It takes many pipe purgings to fill the container, then it's emptied into the tank. Of course a small pump could be put in the container with a water level switch and a hose running up and into the tank, etc. but we're using the KISS rule here (Keep It Slick & Simple).
The drain back water (in the 1" line) does not need to be piped up and over and splash down into the top of the tank as some people (without a basic knowledge of fluid mechanics*) believe. If the weight of the water can go up in a pipe, it can go up through the water in a tank - of any size. The determiner is not the absolute weight or pressure of the water, it's the actual PSI, (emphasis on "Square Inch", i.e. Area) caused by the difference between the height of the water in the pipe and the height of the water in the tank - also called head.
If your water flow is so much (large pump and/or manifold holes) that the drain can't keep up and overflows the trough, the simple solution is to slowly move your 3 way pump valve in the opposite direction to draining the pipe so that the flow out is restricted. (You may have to bend up your handle stop tabs) Remember/mark that position if you need to drain the pipes later. The best solution is to use the largest drain possible/practical.
Another misconception is that the hot water must come into the tank through a different (and far away) location than the colder water going out, to avoid mixing at the entrance/exit and therefore just heating the already hot water and not the water in the rest of the tank.
"The good thing about science is that it's true, whether or not you believe in it." Neil deGrasse Tyson
This sounds logical but fluid mechanics* often defies logic, leading some to build more expensive, cumbersome and even less efficient machines than necessary. Notice that my inlet is right above the outlet but they could even be right beside each other. The incoming warmer water instantly rises and wants to avoid mixing with the colder denser water which wants to stay lower and therefore in the path of the inlet going to the pump. The colder water stays on the bottom and the warmer water stays on top causing a thermocline. As more and more heat is given to the tank, the volume of the warm water will increase, moving the thermocline lower and lower until the entire tank is warm. In theory, the warm tank in the basement, just by itself, should add heat to my home, reducing my fuel bills.
First Season Notes: The system worked extremely well on sunny summer days and into the fall. Even so, I was surprised at how long it took to initially heat up the large tank. Even realizing that it only heats during a sunny day, it took several weeks to get to ~32°C (90°F) as it loses heat to the basement during the night and cloudy days. This is what I didn't want as I enjoy a cool basement (and house) during the summer and fall. I turned it off until needed in late November, but then there just weren't enough sunny days to heat up the tank enough to make a noticeable difference. A few armfuls of firewood gave more heat than this very slightly warm tank ever did.
Summary: This system could work in a climate with more winter sun and less freezing nights and days. Even so, to work well, the water in the tank should be over 40°C (~110°F), hotter is better. In my location I would need many more solar collectors, making this system impractical.
In short, it gave lots of heat when I didn't want it, and very little heat when I needed it. I disconnected and removed it and in its place I built a greenhouse, shown on the, Your Own Greenhouse, page.
* Fluid Dynamics is a part of Fluid Mechanics which is a part of Physics.

"What you do makes a difference and you have to decide what kind of a difference you want to make.”
Jane Goodall
"Physics is the law. Everything else is a recommendation."
Elon Musk
"If something is important enough you should try . . .
even if the probable outcome is failure." Elon Musk
"Physics teaches you to reason from first principles rather than by analogy."
Elon Musk
"I try to see if I can have the value of the output greater than the cost of the input."
Elon Musk

But, as in most experiments, there are usually other factors to consider - some that we may not even have considered at all - like Kirchoff's laws of Blackbody Radiation where a black object (or clothing) in some conditions will give off more heat and therefore be (or keep you) cooler than even a white colour.
"It ain't what you don't know that gets you into trouble. It's what you know for sure that just ain't so." Mark Twain