


My House Finishing
“I can’t believe all the work I have to do before I can start to do all the work I have to do.” D. J. Huggett
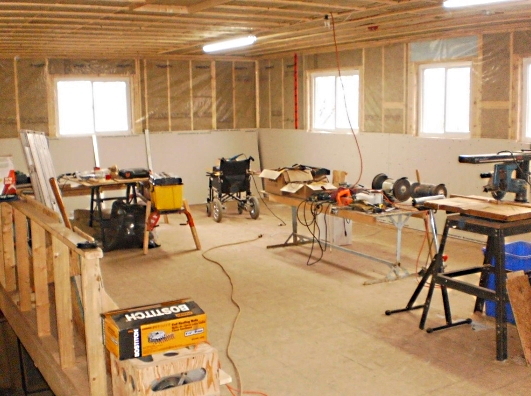
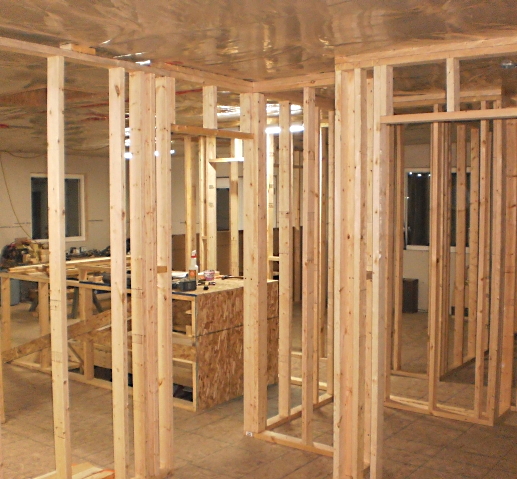
Exterior walls and ceiling have been insulated and the vapour barrier installed. Starting the drywall - the whole house becomes a workshop. The wheelchair in the background will become my next "Personal Transport" but now makes a great tool caddy.
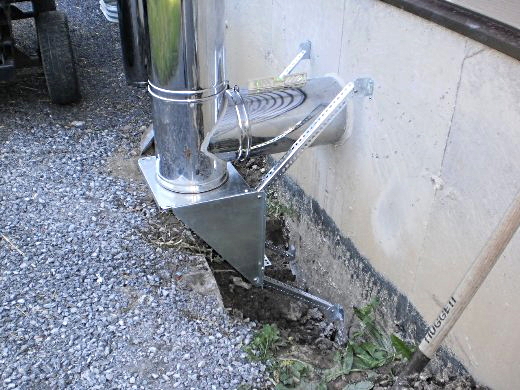
Installing the chimney this way allows the upper part to be attached directly to the fascia without cutting a hole in the soffit and gives a greater clearance from the house. The bottom braces will be buried.
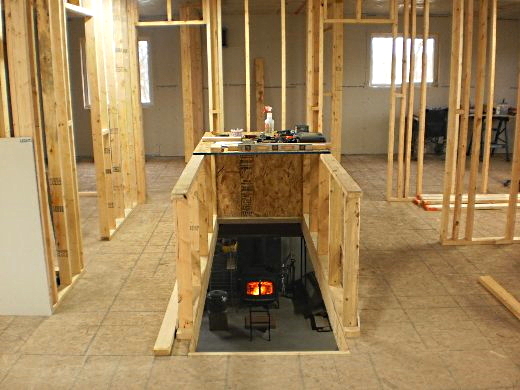
The entire house is evenly heated because of the central staircase and placement of the woodstove in the centre of the back basement wall.
The water tank used in my previous home will not be necessary here, shown on the About The Inventor page.
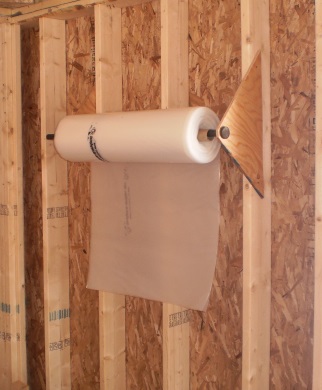
The problem with rolling a vapour barrier out on the floor (after finding a space and getting down on your knees) is that it creates static electricity which picks up every little piece of dirt and sawdust, especially when you're under construction. These wall brackets, made from scraps and an old bar become a dispenser.
It worked quite well.
(unscrewed in seconds
when finished)
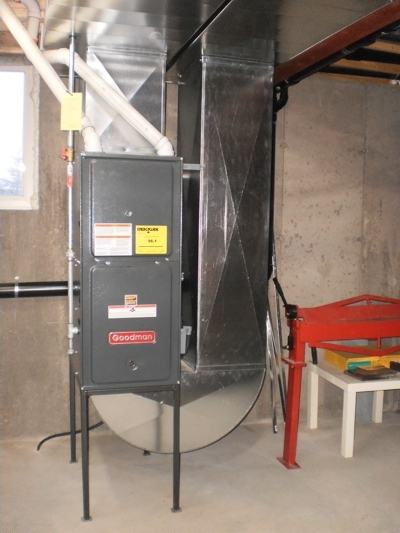
Right - I ordered this 96.1% efficient propane furnace online (Alpine Heating, USA) for $768.00. It was delivered a few days later by tractor trailer. I loaded it into my tractor's bucket at the street and drove it to my walkout basement door and carried it in by myself. Total cost, adding the exchange rate, shipping and taxes came to $1200, still much cheaper than what I could buy here in Ontario.
I designed & installed the complete system including the gas line and ducts, assisted by the red brake at right. Total cost, $4,000.
This is a "Downflow Furnace" and I raised it two feet above the floor, making the cold and hot air plenums two feet shorter. The cold air on top of the furnace goes down (through the furnace) to the burners at the bottom, blown down and around the curved duct and rises up through the hot air duct at right - works even better than I expected.
The bottom can't rust like other furnaces that sit on the floor, especially with the heat at the bottom. I could even add a register there to blow warm air across the basement floor. And, as you can see, I can sweep or vacuum under the furnace.
- cladding the outside with 1" styrofoam to bring the total wall insulation to ~R28
- plank between scissor lift and tractor bucket is to work on, over the basement walkout, it leveled as the scissor lift rose - of course
- ledger board, behind tractor, is for the deck attachment which will also rest on the foundation lip
- satellite cable going into foundation is behind the orange, plate compactor handle
- top vent, beside door, is from the central vacuum
- bottom temporary vent is from the dryer which now exhausts at front of house
"The more machines you have to save you time and money, the more time and money you need to maintain those machines."
D. J. Huggett
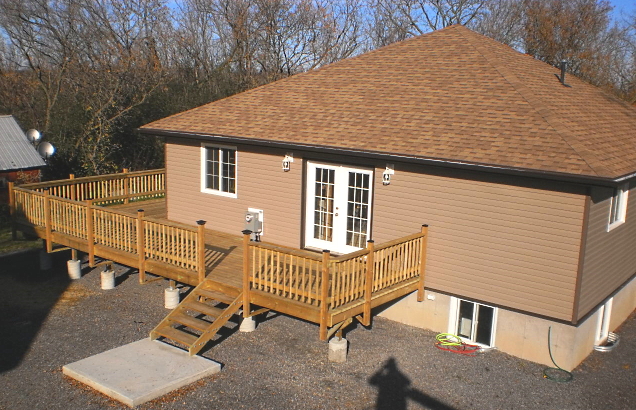
Almost finished - see A Cupola Roof Vent page. I don't like attaching anything to my new siding, or eaves so the satellite dishes are attached to the old back shed and the cables run underground into the basement. A few years later I cancelled my satellite subscription in favor of the new wireless Internet Service.
taken from my scissorlift, just partway up.
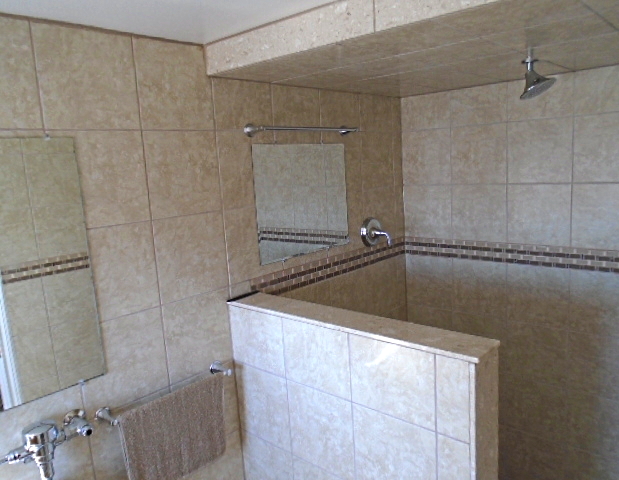
Below - Ensuite shower stall start - you can't see the bench or the niche behind the half wall - notice the drywall strips as tile guides. Right - Finished - towel removed to show mirror. Since the stall is 5 feet wide (4 feet deep) the towel stays dry during a shower and there is no water splash outside of the shower area. It doesn't need a glass enclosure which would add to the cost, need constant cleaning, restrict the air flow and tend to fog up.
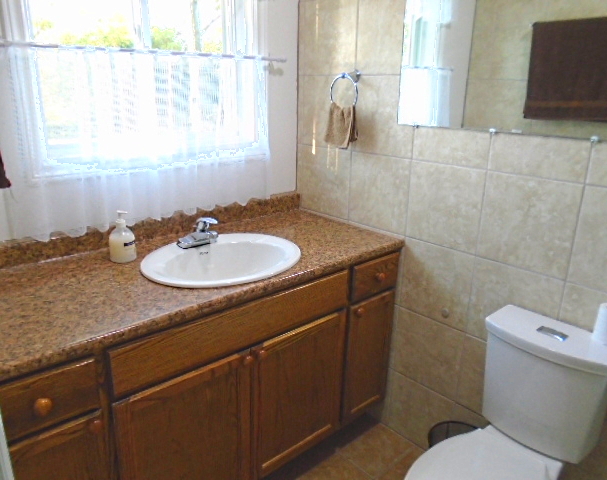
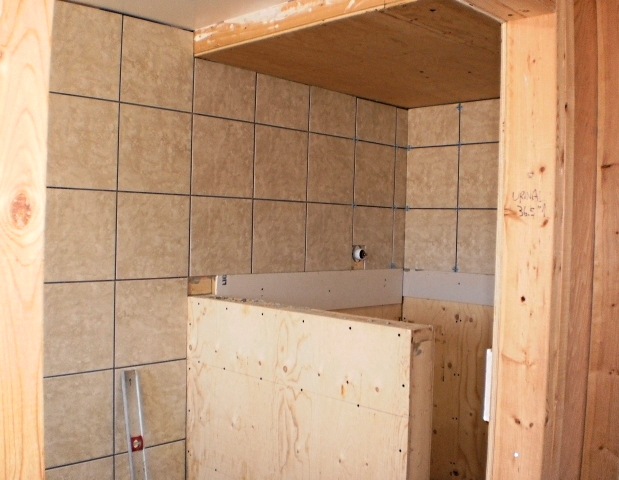
The complete ensuite, from the studs out, including all the fixtures, cost about $1000.
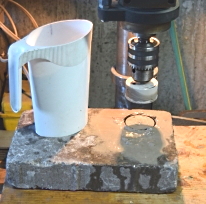
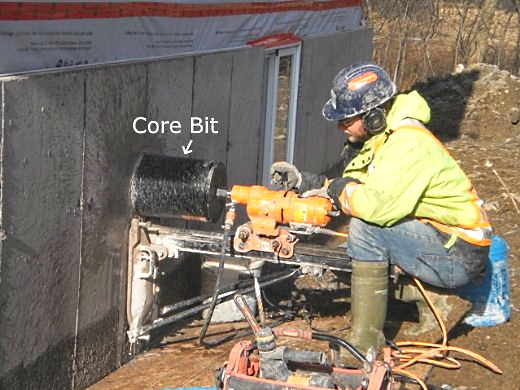
A 10" hole is cut into the concrete foundation for the woodstove chimney. The black, diamond core bit alone, cost the owner a thousand dollars.
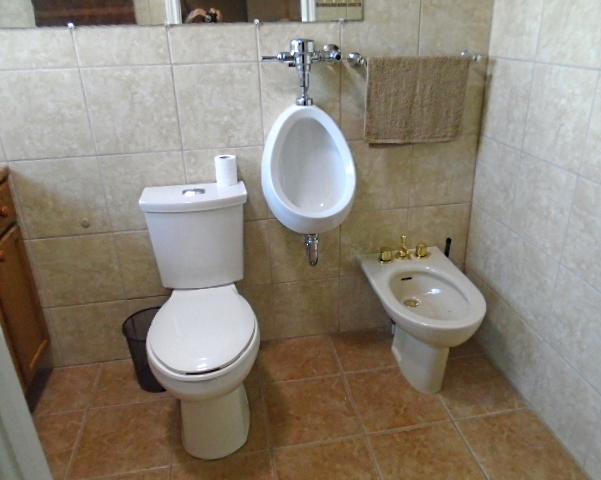
The Urinal with Flush Valve was $300 (@Rona in Belleville) but the Bidet (second hand) was free.
House Finishing continued on the next page, Build A Chef's Kitchen

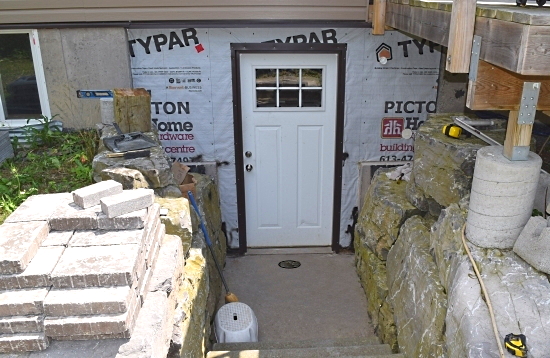
Much later - the door frame is capped with leftover aluminum (flat stock) from the house. The concrete foundation lip is too narrow for regular 4" bricks so instead, I used large paving stones (2.5" thick, in the left foreground) from Napanee Home Hardware.
Finished, the stones were treated with a concrete sealer using a paintbrush. The whole job took several days and cost less than $300, including the stones, mortar, sealer and door paint.
drilling a paving stone with a diamond hole saw for the central vac exhaust vent
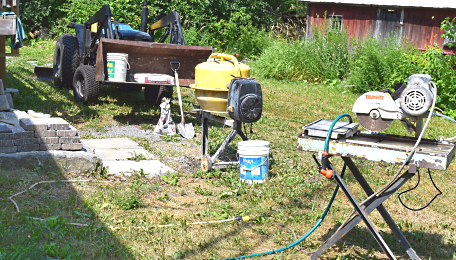
Above - buying the materials and getting all of my tools setup, took the whole day.
Left - the unused dryer vent hole was foamed in when the dryer was moved.
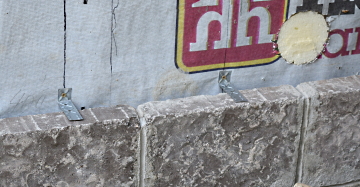
The stones are anchored to the house with wall ties screwed into the studs.
If you had an 8" length of 10" Sono tube, it could be placed between the forms, before pouring the concrete so that the hole would not have to be drilled later.
Using any paste wax, you would want to coat the outside of the tube to make removing the cardboard easier.
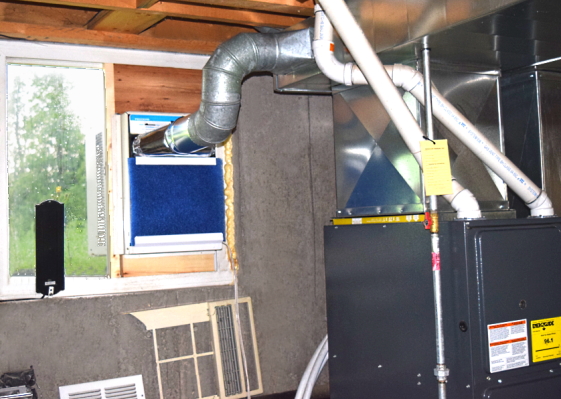
I've thought of trying this many years ago and therefore designed my new house with a window beside the furnace. When a discarded (because of the smashed grill, shown below the unit) 10,000 BTU window unit was given to me, I installed it here, using old elbows. Total cost was $15.00 for the boot (attached to unit) and the blue filter material, (@ Lowe's) which was enough to make several filters.
It took a few hours to cut the wood, bend the aluminum brackets and install originally but only takes about 10 minutes each spring and fall to install or remove. The wood and aluminum scraps were leftover from my house construction.
With the downstairs heat ducts, and upstairs return vents, blocked, and the furnace fan on, it works amazingly well. Of course it's not as powerful as a dedicated central system and won't cool down a hot house much, but if turned on before the house heats up, it will keep it cooler. People who walk in on a scorching 35C (90+F) day, into my 25C (75F) house can't believe that it's not a "conventional central air" system. And, it only draws 1050 watts - plus the furnace fan, making it much cheaper to run.
So, because this is a "reverse flow" furnace, the ducts from the air conditioner go into the cold air return plenum on top, making it a simple and easy connection.
Using my drywall lift to do the ceiling. Had to remove the temporary railing. It was a bit tricky working over the open staircase, the right caster kept trying to go off the board.


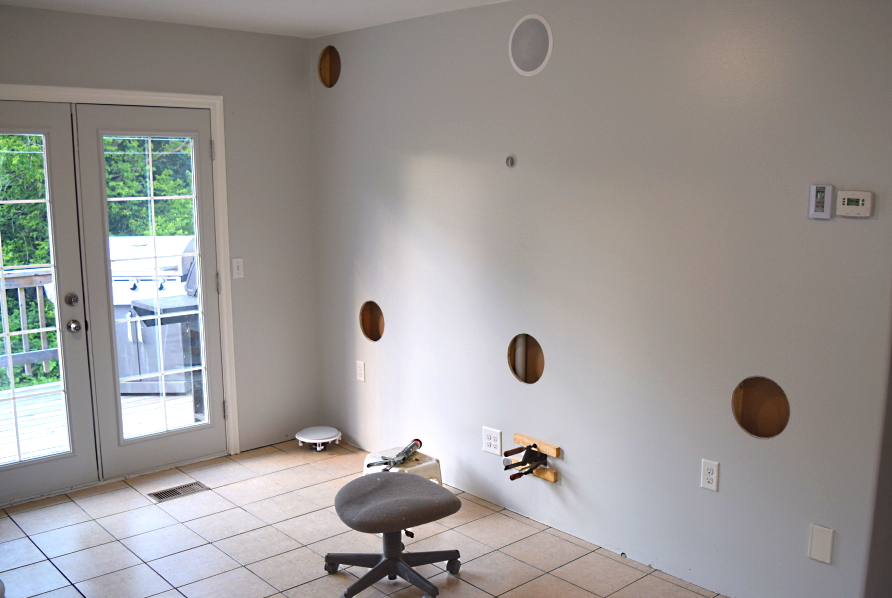
Building a "Speaker Wall"
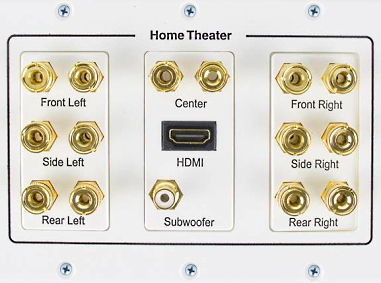
The clamps are holding glued wood inserts inside the wall to mount the 7.1 Home Theater wall plate, below - from Amazon.ca
(I paid $25 in 2017 and they were selling for $31 in 2022)
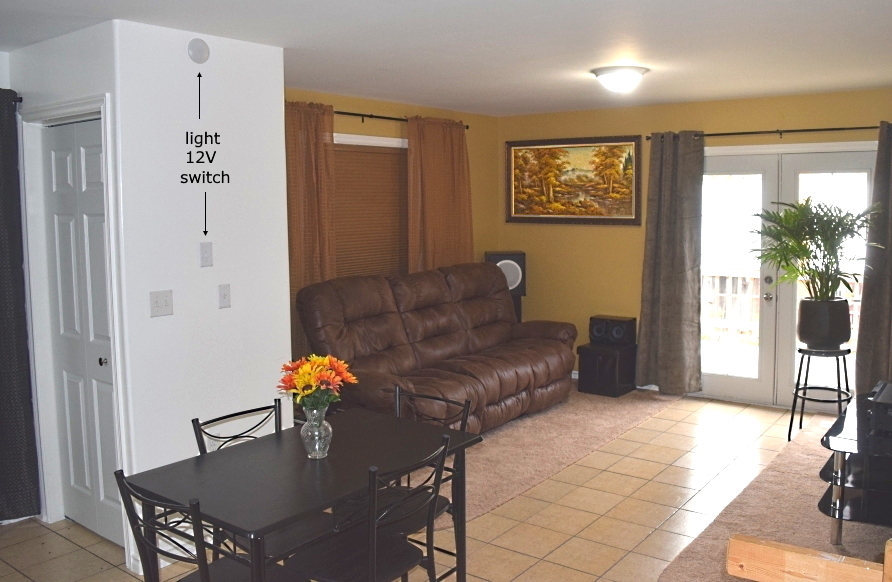
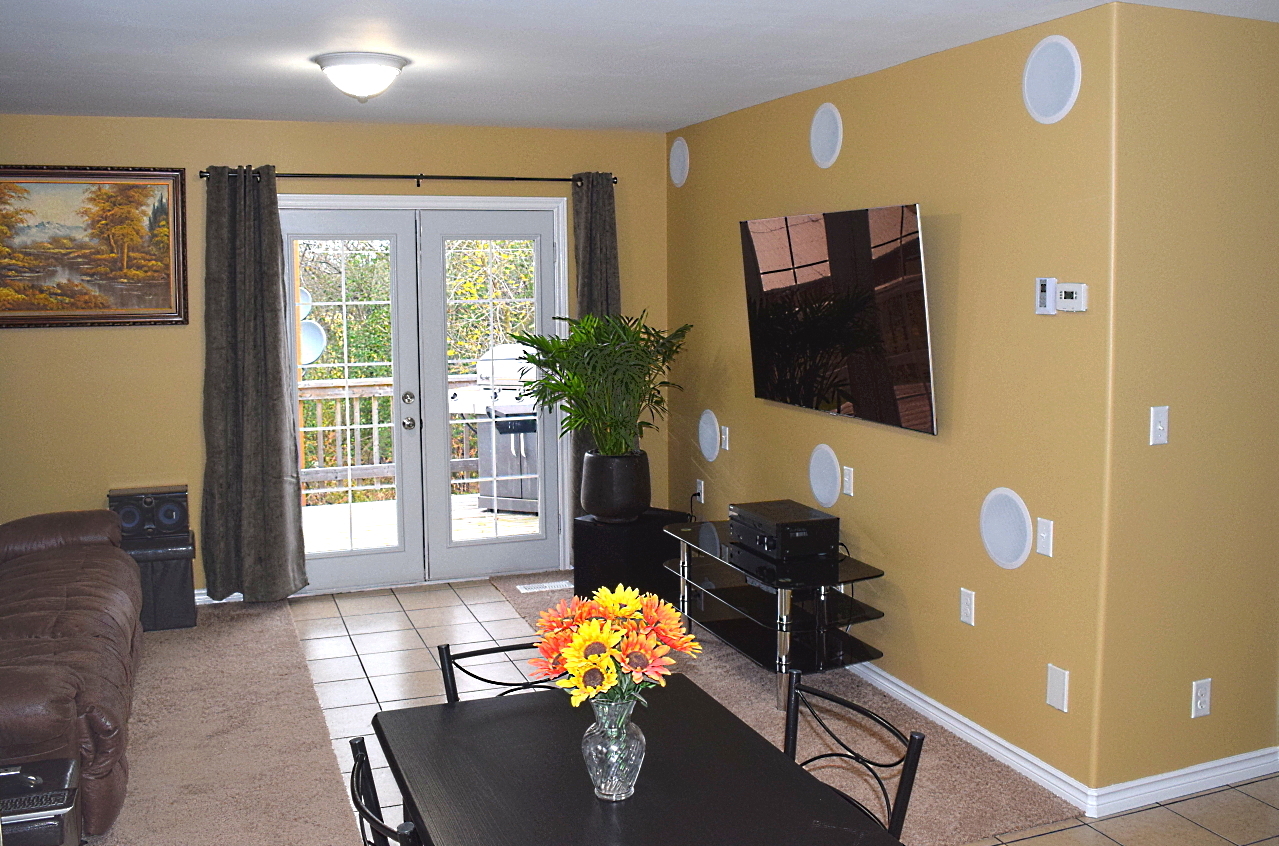
Right - Living, Dining area showing the wall switches, the bottom ones control the room and outside light fixtures. The higher separate switch, easier to locate in a blackout, controls the 12V LED light at the top of the wall and four other LED lights throughout the house. The basement and bedroom fixtures also have separate On/Off switches to save energy when not in use.
Below - Samsung QLED 65" TV with wires hidden in the PVC conduit, partially seen in above pic and shown just installed at the top right of Household Tips & Tricks page.
Micca 2 way 8" 100 watt speakers from Amazon, in the wall, which saves floor space and at $49.95 are cheaper than comparable floor/box units. The switches beside the bottom speakers turn the top (series wired) speakers on and off for a different sound experience. More speakers (side and rear) for a 7.1 system. The Klipsch 12" 400W subwoofer is a bit 'overkill' but it was on sale, makes a nice plant stand and can be turned down to match this room. The acoustics are great, even better than expected.