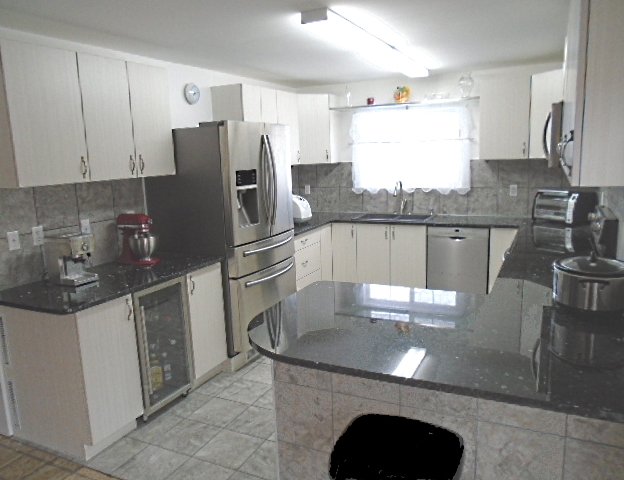


Build A Chef's Kitchen
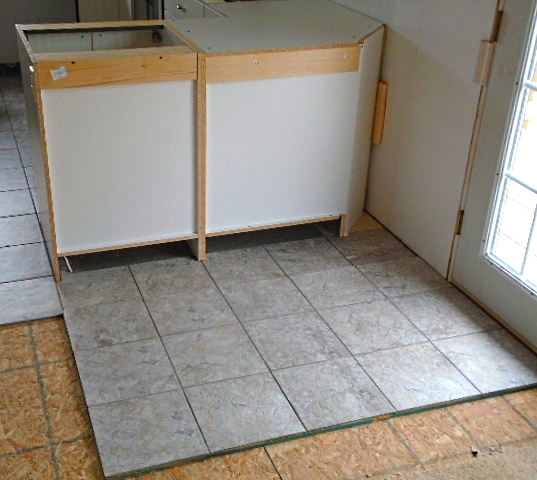
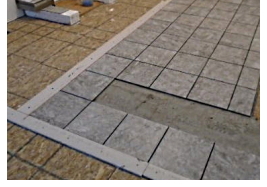
Starting the Floor: Drywall strips (inset picture) worked perfectly as straightedge guides. I don't usually tile completely under the cabinets as it makes it easier to later add plumbing and cabinet wiring.
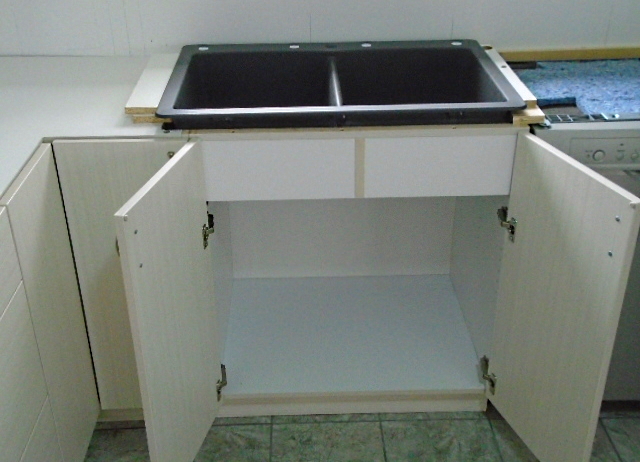
30 cu/ft Fridge and Wine (drink, etc.) Cooler installed - now to make cardboard templates for the granite countertops and prepare the 30 inch sink base to accept a 33 inch wide sink, shown upside down under the window.
The finished reinforced sink base - large "granite" sink on shims at counter height. Was a bit tricky to move the door hinges down and fill the old holes.
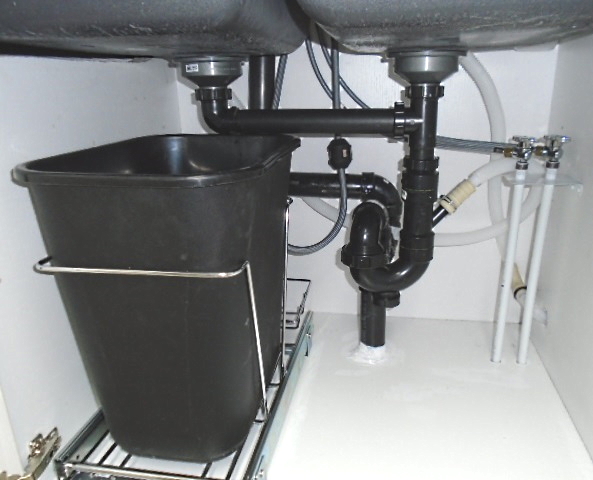
Under Sink Plumbing
- trap installed to right of center to clear "slide out" waste bin
- "shut off" taps high up to clear the storage area in front
- notice custom 'tap' bracket, made from scrap furnace duct steel and painted white
Now,
how to finish the cabinet backs of the peninsula?
- what to use?
Why not use the floor?
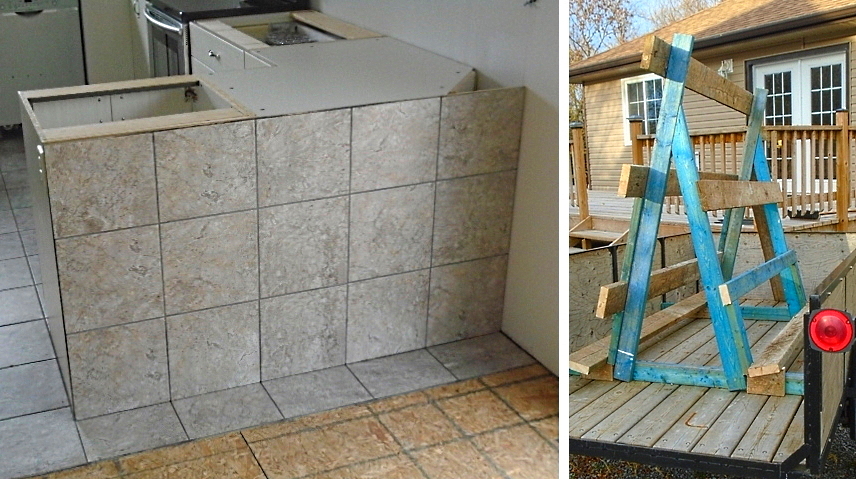
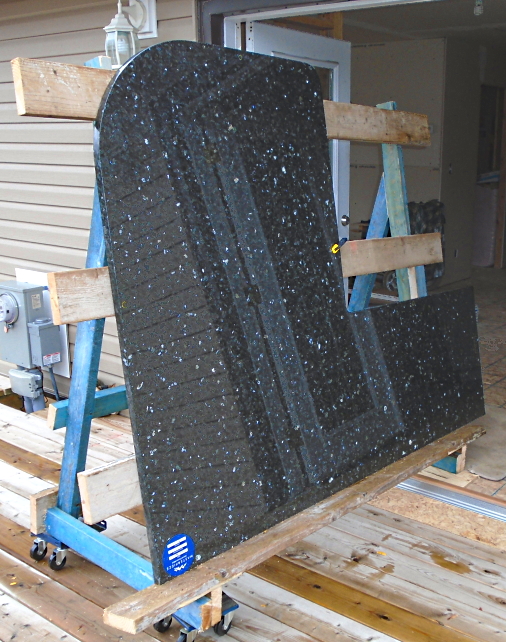
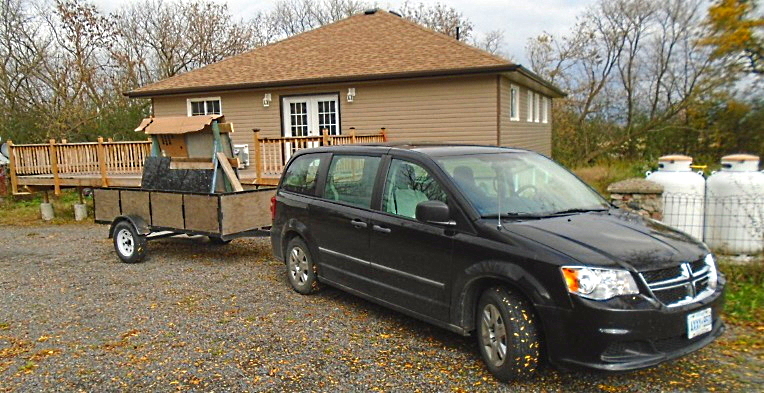
Far Right - Now to pick up the granite countertops with this 'A' frame, which I quickly cobbled together from leftover pieces.
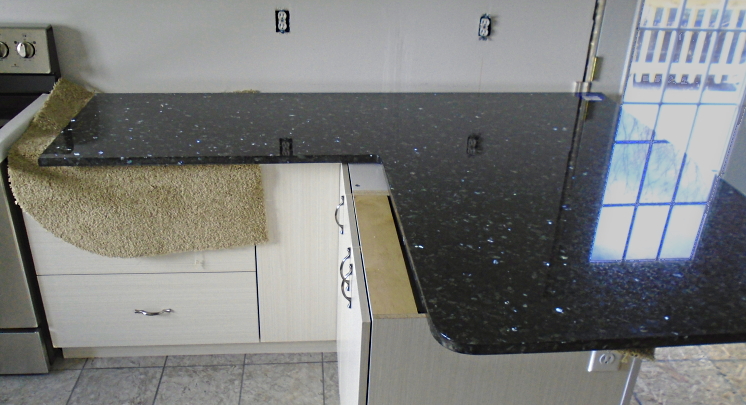
Tip: The Ontario Electrical Code requires an outlet in a peninsula if it protrudes by two feet or more.
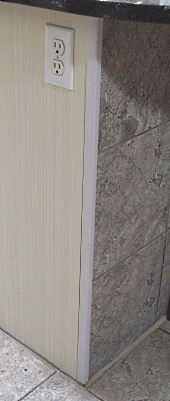
I finished the edge by bending a leftover piece of white aluminum into a "C" channel shape and pressing it around the tile and the 1/2" plywood backerboard.
Installing A Granite Countertop (By Yourself)
Ratchet straps removed, the smallest countertop (200 lbs.) I've carried in already, then I backed the trailer up to the deck. I put a piece of 1 1/2" plastic "J" trim under the next two "L" shaped countertops and slid them off the 'A' frame, then installed all three. The fourth, a 400 pound one, presented a special challenge.
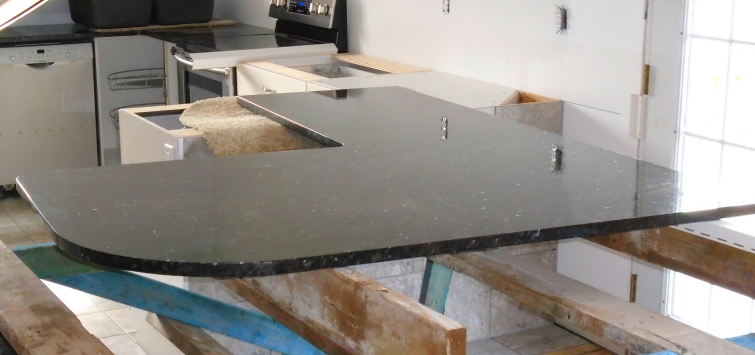
This piece could not be lifted up to install a piece of "J" trim underneath, then slid off the A frame like the previous two. It seemed to become part of the A frame, so I trimmed the bottom 2X4s, lifted the A frame up and set one end on rollers. Then I lifted the other end and walked it into the house.
Then I tipped the frame over onto sawhorses, shimmed with blocks and boards and jacked up the other (wider) end with a drill powered scissor jack and placed blocks underneath until it was at counter height. Even the drill was straining and it was switched to low speed, high power.
Then I placed carpet remnants underneath and pushed the top into place. It was quite a "tour de force".
- all (in stock) cabinets (white chocolate) plus wine cooler, $5200 (Lowes 20% off sale)
- "Emerald Pearl" 1 1/4" granite countertop (pick up), $3900 (62 sq. ft.)
- all porcelain tile and accessories, (hardware, stainless & glass shelf above window, sink, taps, plumbing, etc.) $800
Total Kitchen Cost - $9,900 (appliances extra, of course)
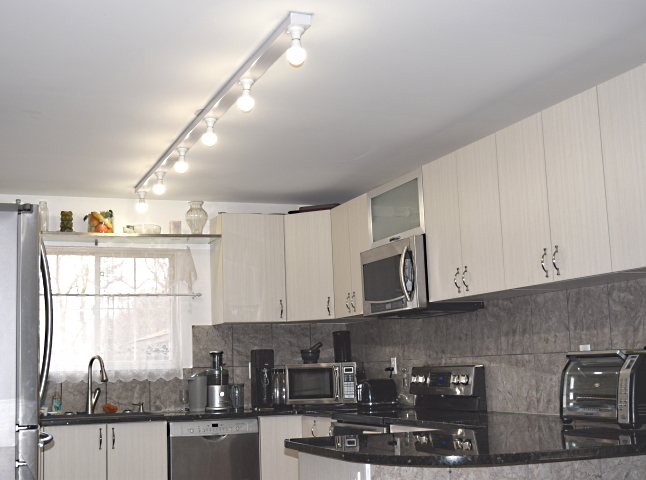
Kitchen finished. I originally installed a standard light fixture but even with the brightest bulbs allowed, there just wasn't enough light, especially to work in a kitchen. I replaced it with a T8 fluorescent fixture (64W) and it was an improvement but it was made even better with the addition of a second one. Strip fixtures can be "ganged" together without additional ceiling boxes.
After a few years, I had to replace several T8 bulbs, so I custom built a 10½ foot long light fixture on my bending brake using heavy gauge (eavestrough) aluminum and installed six dimmable LED bulbs which cost less, give more and better diffused light using less electricity and will last longer. (Bulbs installed into "E27 round socket housings" from Amazon)
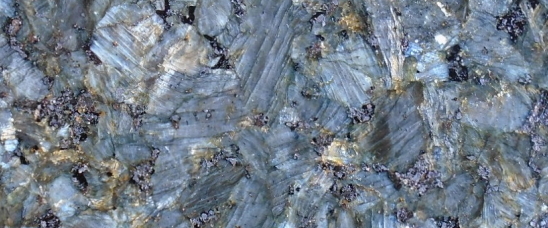
A close-up of the crystalline structure of this granite counter top photographed under special conditions with natural sunlight.
All real granite will show a similar pattern.
Of course, if you already have your cooktop and know where it will go, it's always easier to have the granite company pre-cut the hole before the countertop is installed. In my case it would have been much easier as I installed mine over a 12" base cabinet so I couldn't cut right to the edges because of the wood underneath.
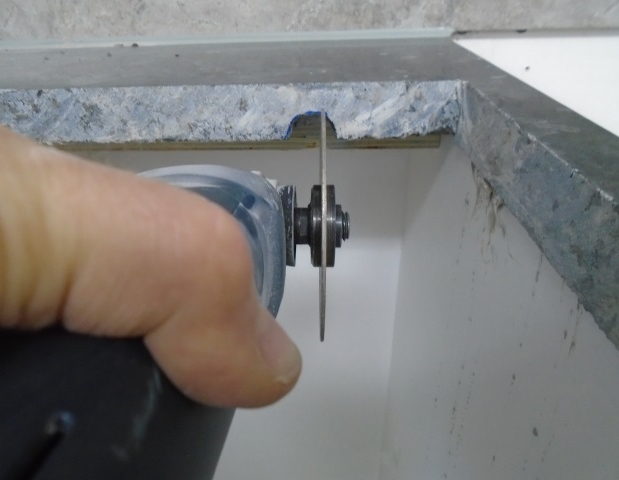
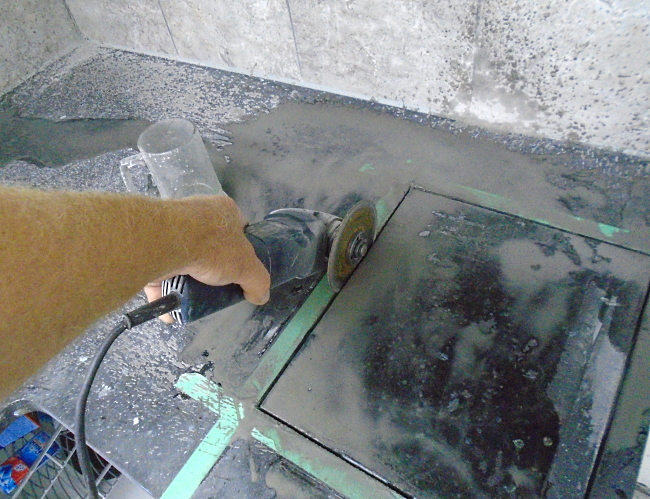
It's a dirty, messy job but it cleans up easily in the end.
This cooktop would easily fit into a 5/8" Arborite top or even a 3/4" Granite top but the cord has no clearance with this 1¼" Granite top. Fortunately this was a quick and easy fix with the diamond grinder, just took a minute.
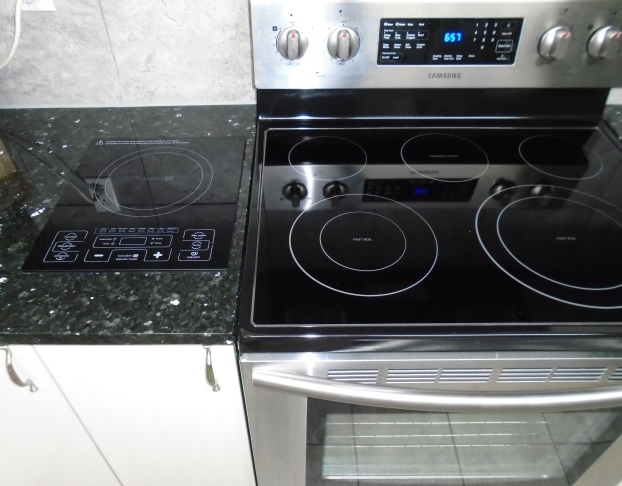
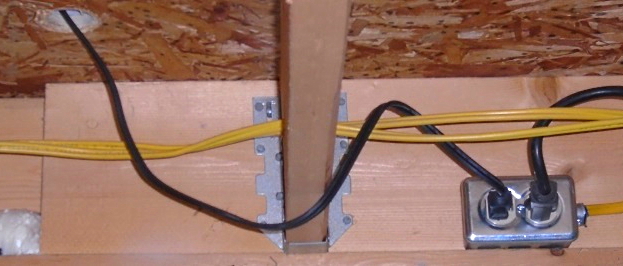
Left - It fits perfectly and only protrudes 1/4" into the cabinet although it appears more with this camera angle. I just drilled a hole in the cabinet bottom and the floor beneath (from the basement) then ran the cord down and into a 20A basement outlet installed just for that purpose. (bottom right)
Installing it this way is not only the easiest, it makes it very easy to replace or remove for cleaning. For that reason and because of the perfect fit, caulking is not necessary. If your hole is a bit too large just tape the granite sides or glue on some gasket (or similar) material.
Besides having no visible cord plugged into (and using up) a kitchen outlet and the pleasing flush look, another benefit is how quiet the cooling fan is when inside the cabinet, much quieter than the microwave or stove exhaust fan.
I have had no problems with cooling but because of the speed and efficiency of this Kuraidori 1800 watt unit I have never had it on for more than a few minutes. The fan stays on for the same period of time as it did when cooking on top of the counter.
If it was used extensively for long periods (i.e. canning) and cooling became a problem, I would cut some large holes into the side cabinet walls, or for that rare "long cooking" time, just open the door.
"In my youth I exercised to get better. Now I exercise to get worse, slower." D. J. Huggett


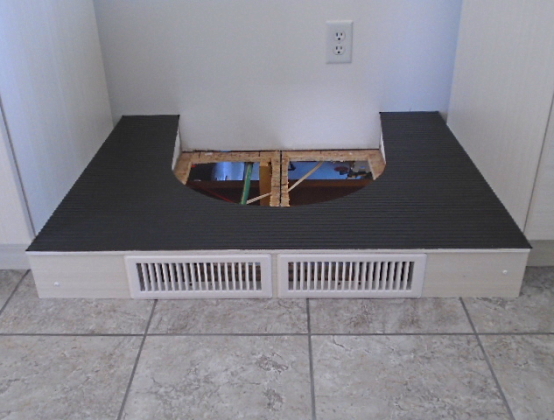
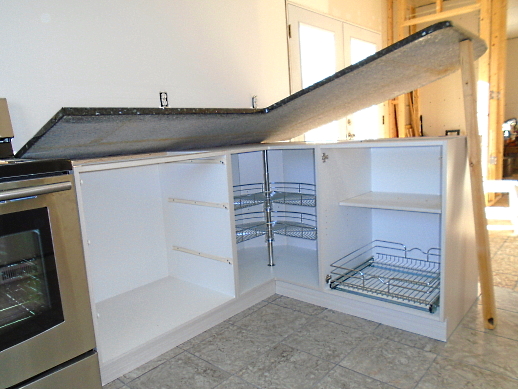
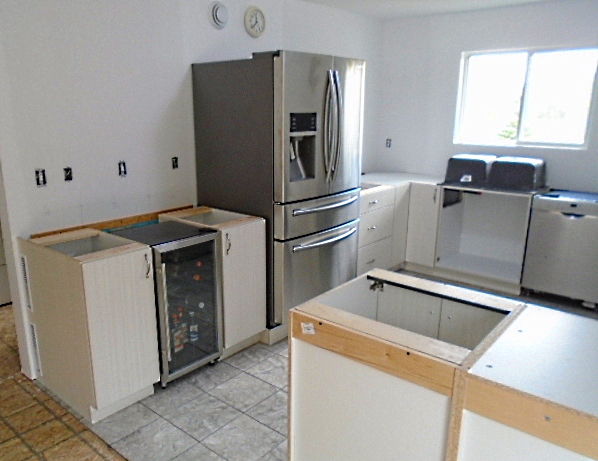
The rectangular white boxes are attached to the floor and will become a raised base for the refrigerator. This not only gives access to the interior of the fridge a more "user friendly reach" but it aids in ventilation.